Ibex 101 Hands-on Lab#
Prerequisite to use Ibex#
Internet connection#
To start using Ibex you should be connected with iCampus/Uni-Fi/KAUST network or use VPN when outside of KAUST network.
Mac OSx#
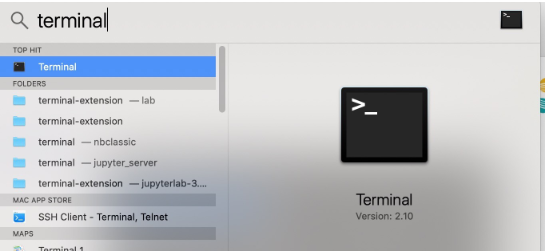
MacOS usually has a terminal application pre-installed. Please type Terminal in spotlight search tool to find it.
Open the terminal, copy and paste the command for the appropriate login node you wish to access.
Note
For macOS clients, it is necessary to install XQuartz (X11) to be able to use GUI applications.
Windows#
To get a ssh client application on a Windows machine, you can opt from one of the following methods:
Download and install one of the
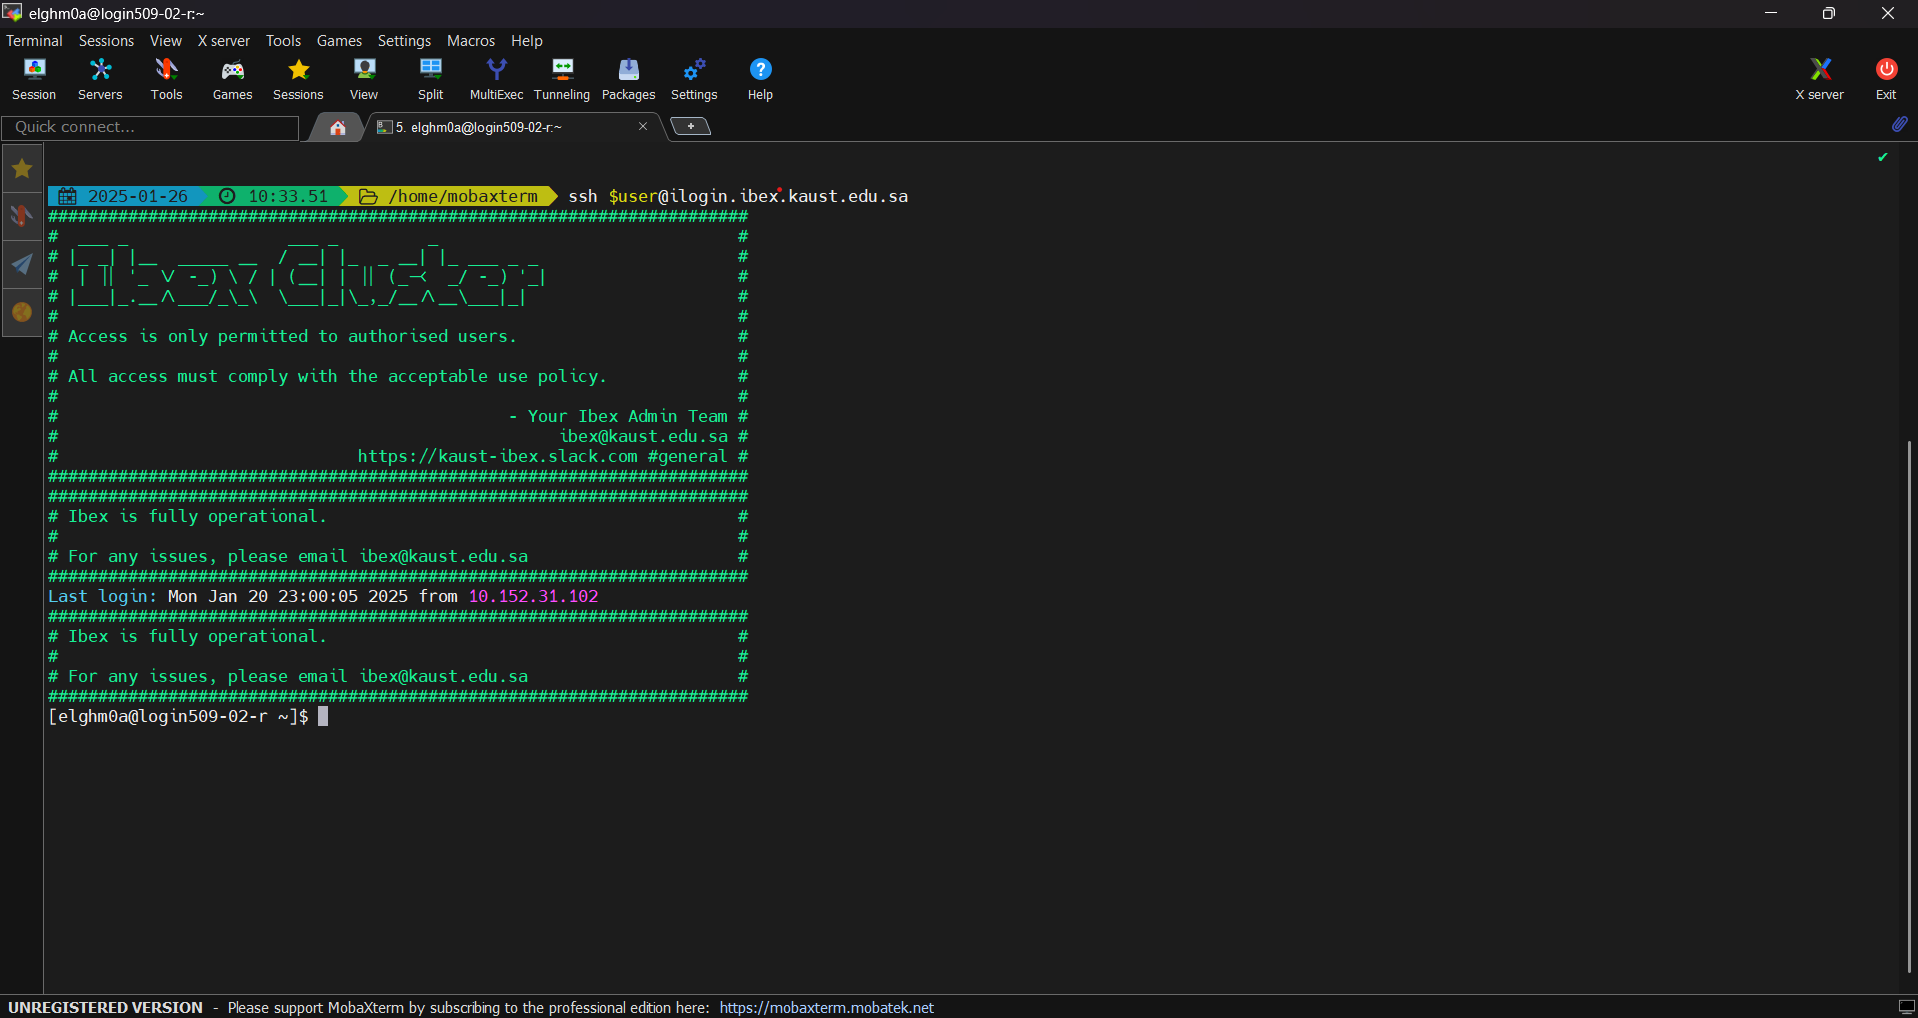
ssh clients: PuTTY, MobaXTerm or GitBashAs an example, here is how to use MobaXTerm on Windows to access KSL systems.
Contact Us#
There are multiple venues you can contact us for support and information. Before sending a support request, be sure to navigate and search the documentation for related information.
The easiest and most efficient way is to contact Ibex support:
Ibex cluster helpdesk
Ibex Slack channel
As a rule of thumb, if the issue is complex to describe, please send an email for requesting support. If the question is of general nature and can be stated in a line or two, Slack channel is most appropriate.
How to login?#
Ibex clusters consist of 3 different login nodes:
To submit CPU only jobs, login to ilogin
ssh -XY $USER@ilogin.ibex.kaust.edu.sa
Note
$USER is your KAUST username.
To submit jobs with GPU, login to glogin
ssh -XY $USER@glogin.ibex.kaust.edu.sa
If you want to access your files when editing/develop in IDE like VS Code, login to vscode
ssh -XY $USER@vscode.ibex.kaust.edu.sa
Note
If you’re using a personal Laptop / Desktop replace $USER with your KAUST username.
Storage details#
Home filesystem#
/home filesystem is a place where users are expected to keep their configuration and installation scripts, the rc files required by some software. This filesystem has per user quota on both size and number of files. It can be access with the /home/$USER path. /home filesystem has limited performance. Users are expected not to run their jobs and applications from /home directory.
Warning
Please refrain from installing your conda package manager, related cache, and environments in /home/$USER directory. Please use the /ibex/user/$USER filesystem for purpose.
Upon login the current working directory of the session is the $HOME directory.
Users can check their quota on /home using the following command:
quota -s
Output:

Disk quotas for user ###### (uid ######):
    Filesystem   space   quota   limit   grace   files   quota   limit   grace
fs-nfs-60.admin.vis.kaust.edu.sa:/home/home
                178G    180G    200G            853k   4295m   4295m
In the case above, the maximum quota for capacity on /home filesystem is 200GB.
Home directories are shared across all KSL systems so all your data stored on /home will be accessible from least the login nodes of any KSL system.
User HPC filesystem#
/ibex/user/$USER is a high performance parallel filesystem which provides storage for running your jobs and read/write data. In contrast the /home filesystem, this filesystem has low latency, high bandwidth and is capable of high I/O operations per second (IOPS). This parallel storage runs WekaIO Filesystem, they are providers of modern parallel filesystems tailored for high IOPS workloads such as AI and Bioinformatics.
User’s HPC filesystem has a capacity of 1.5TB per users and remains for the lifetime of the user’s account on Ibex. Users must manage their own files, which means if you run out of quota, there will be no extensions to the quota without exception.
Users can check their quota on /ibex/user/$USER using the following command:
df -h /ibex/user/$USER
Output:

Filesystem      Size  Used Avail Use% Mounted on
user            1.5T  1.3T  274G  83% /ibex/user         853k   4295m   4295m
Project HPC filesystem#
There are instances where your research team is collaborating on a common goal and is sharing or using the same input dataset. This is calls for a shared directory where a group of users can have access to files which can be managed by the one or more members of that group.
There is a file system used for regular projects and an additional file system for encrypted projects.
/ibex/project/cxxxxis root path to such a directory. This too is part of the same WekaIO filesystem as the User HPC filesystem above.
Users can check their quota on /ibex/project/cxxxx using the following command:
df -h /ibex/project/c2247
Output:

Filesystem      Size  Used Avail Use% Mounted on
project          13T   12T  1.2T  92% /ibex/project
Encrypted file system path starts with
/encrypted.
Users can check their quota on /encrypted using the following command:
df -h /encrypted/e3001
Output:

Filesystem      Size  Used Avail Use% Mounted on
ddn606-fs1      200T  127T   74T  64% /encrypted/e3001
If you run out of disk space on Ibex you might face the following errors:
“No space left on device”.
“Disk quota exceeded”.
Other similar errors.
The first step to check limits or resolve quota issues is to identify which disk is in question. This can be done by looking at the beginning of the full path to the affected directory and check with the allocated disk space Vs used disk space.
To get project allocation, users must . Users are required to add their respective Principal Investigator (PI) and they need to approve such request, before an allocation can be made. Up to 80TB of space can be requested through this process. For a larger request, please fill this form, which will be presented in front of the RCAC committee, the awarding body for resources on KSL systems. After an approval is granted by RCAC, the applicant must to get the allocation on filesystem.
Module system#
Linux modulesystem is a tool for enabling dynamically changing the environment of existing Linux shell. It is commonly used where multiple environments are expected to be used by one or multiple users. Rules can be added a modulefile and contains changes to be implemented when switching an environment from default to the desired.
A comprehensive set of software has already been optimally compiled on Ibex and made available to users via modulesystem.
module avail#
To view the available modules on your HPC cluster, use the following command:
module avail
Ex: On glogin node check what versions of cuda are available?
ssh -XY $USER@glogin.ibex.kaust.edu.sa
module avail cuda
Ex2: On ilogin node, check available versions of GNU compiler modules
ssh -XY $USER@ilogin.ibex.kaust.edu.sa
module avail gcc
module load#
To load a module, use the module load command:
module load <package-name>
When loading a specific version of the package:
module load <package-name/version>
To unload a module and revert to the default environment, use the module unload command:
module unload package-name
Ex: On ilogin, load the GNU compiler. Then use glogin to load the CUDA module
ssh -XY $USER@ilogin.ibex.kaust.edu.sa
module load gcc
ssh -XY $USER@glogin.ibex.kaust.edu.sa
module load cuda
Ex2: Load the Python 3.11 module:
module load python/3.11
Ex3: Unload previous Python version and use Python 3.9.16:
module unload python/3.11
module load python/3.9.16
module list#
To see the modules currently loaded in your environment, use:
module list
Ex:
Are there any modules loaded by default?
If yes, which ones are loaded?
Ex2: On ilogin node after loading openmpi module, check its version, check what other modules are loaded?
ssh -XY $USER@ilogin.ibex.kaust.edu.sa
module load openmpi
module list
Using SLURM#
SLURM jobscript explained#
Batch jobs can be submitted to SLURM scheduler so they can run when the requested resources are available for use. This section introduces what a jobscript is and how to configure it to request different allocatable resources.
You can find all the jobscripts for the labs at this repo
During our Ibex 101 hands-on session, the example job scripts will be cloned from a GitHub repository into your personal scratch directory at /ibex/user/$USER. Follow the steps below to clone the required job scripts.
cd /ibex/user/$USER
git clone https://github.com/kaust-rccl/ibex_101_labs.git
cd ibex_101_labs
UNIX/Linux editors#
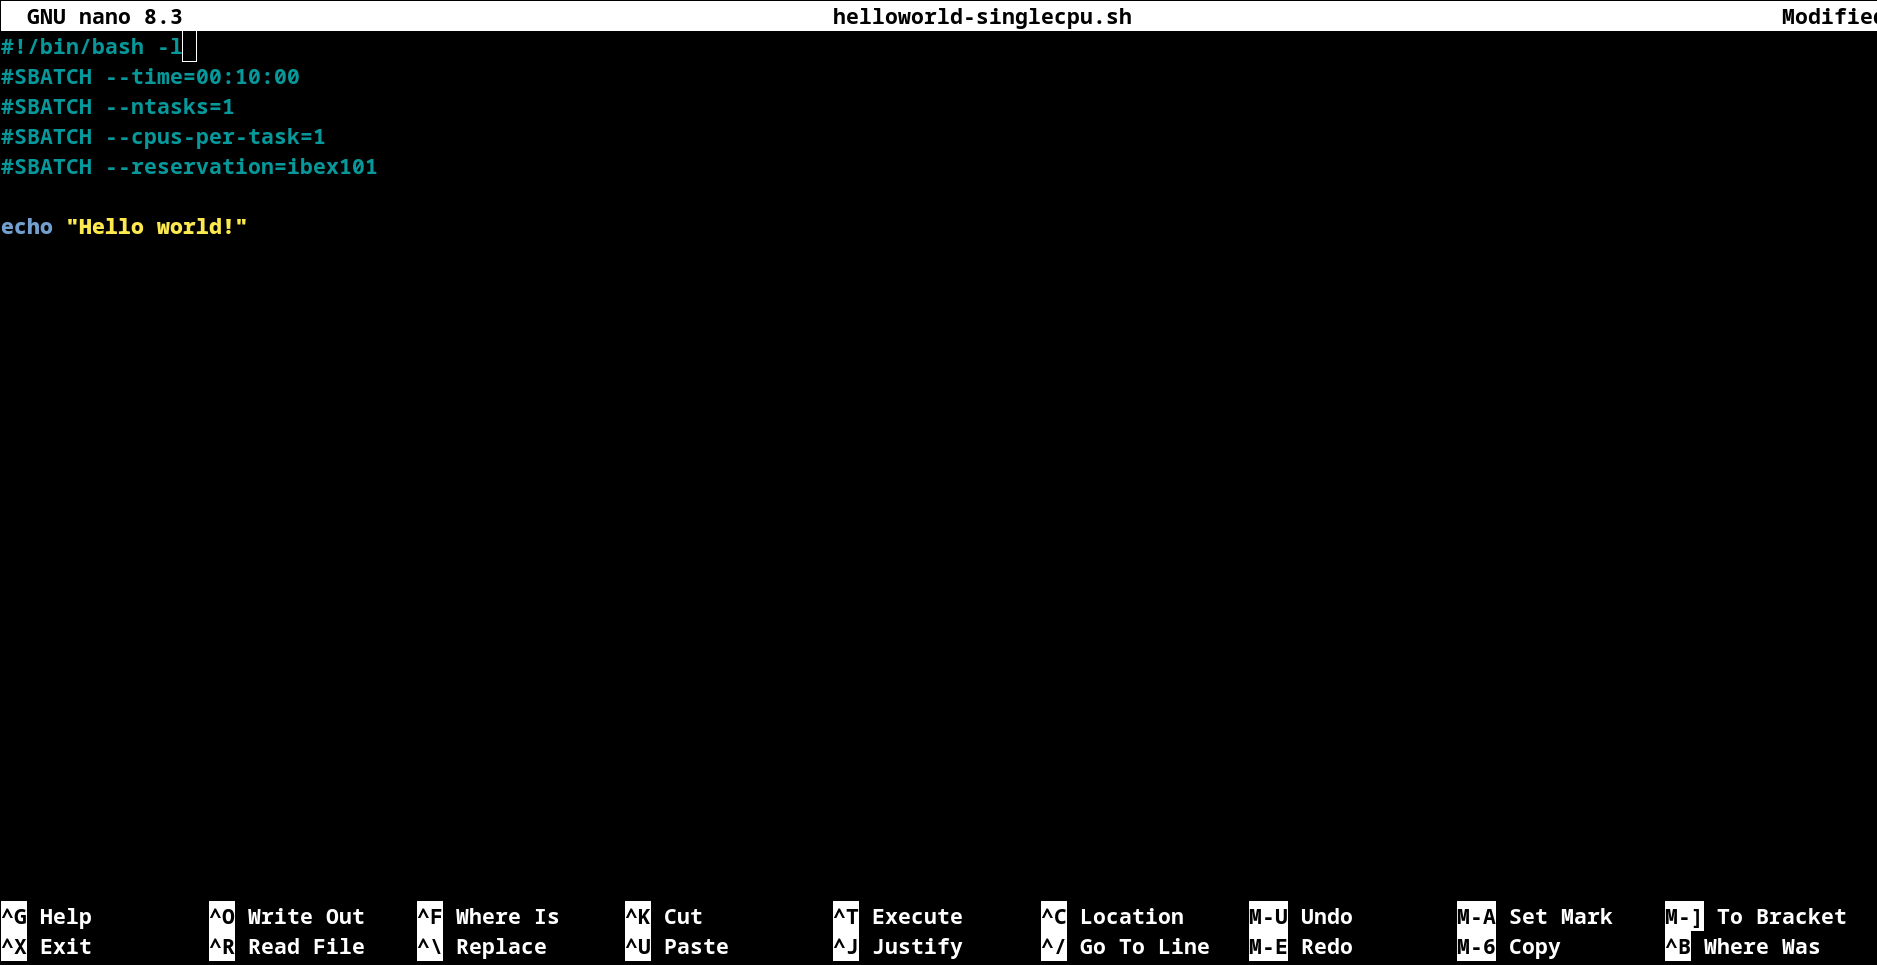
Using nano to Edit Job Scripts
Nano is a simple, command-line text editor commonly used on Unix/Linux systems. It is often used to edit job scripts for submitting tasks to job schedulers like SLURM.
Opening or Creating Files:
To open an existing file or to create a new file, type nano followed by the file name:
cd /ibex/user/$USER/ibex_101_labs/slurm-job-examples/cpu-jobs
nano helloworld-singlecpu.sh
Editing Files:
Modify job runtime to be #SBATCH --time=00:20:00
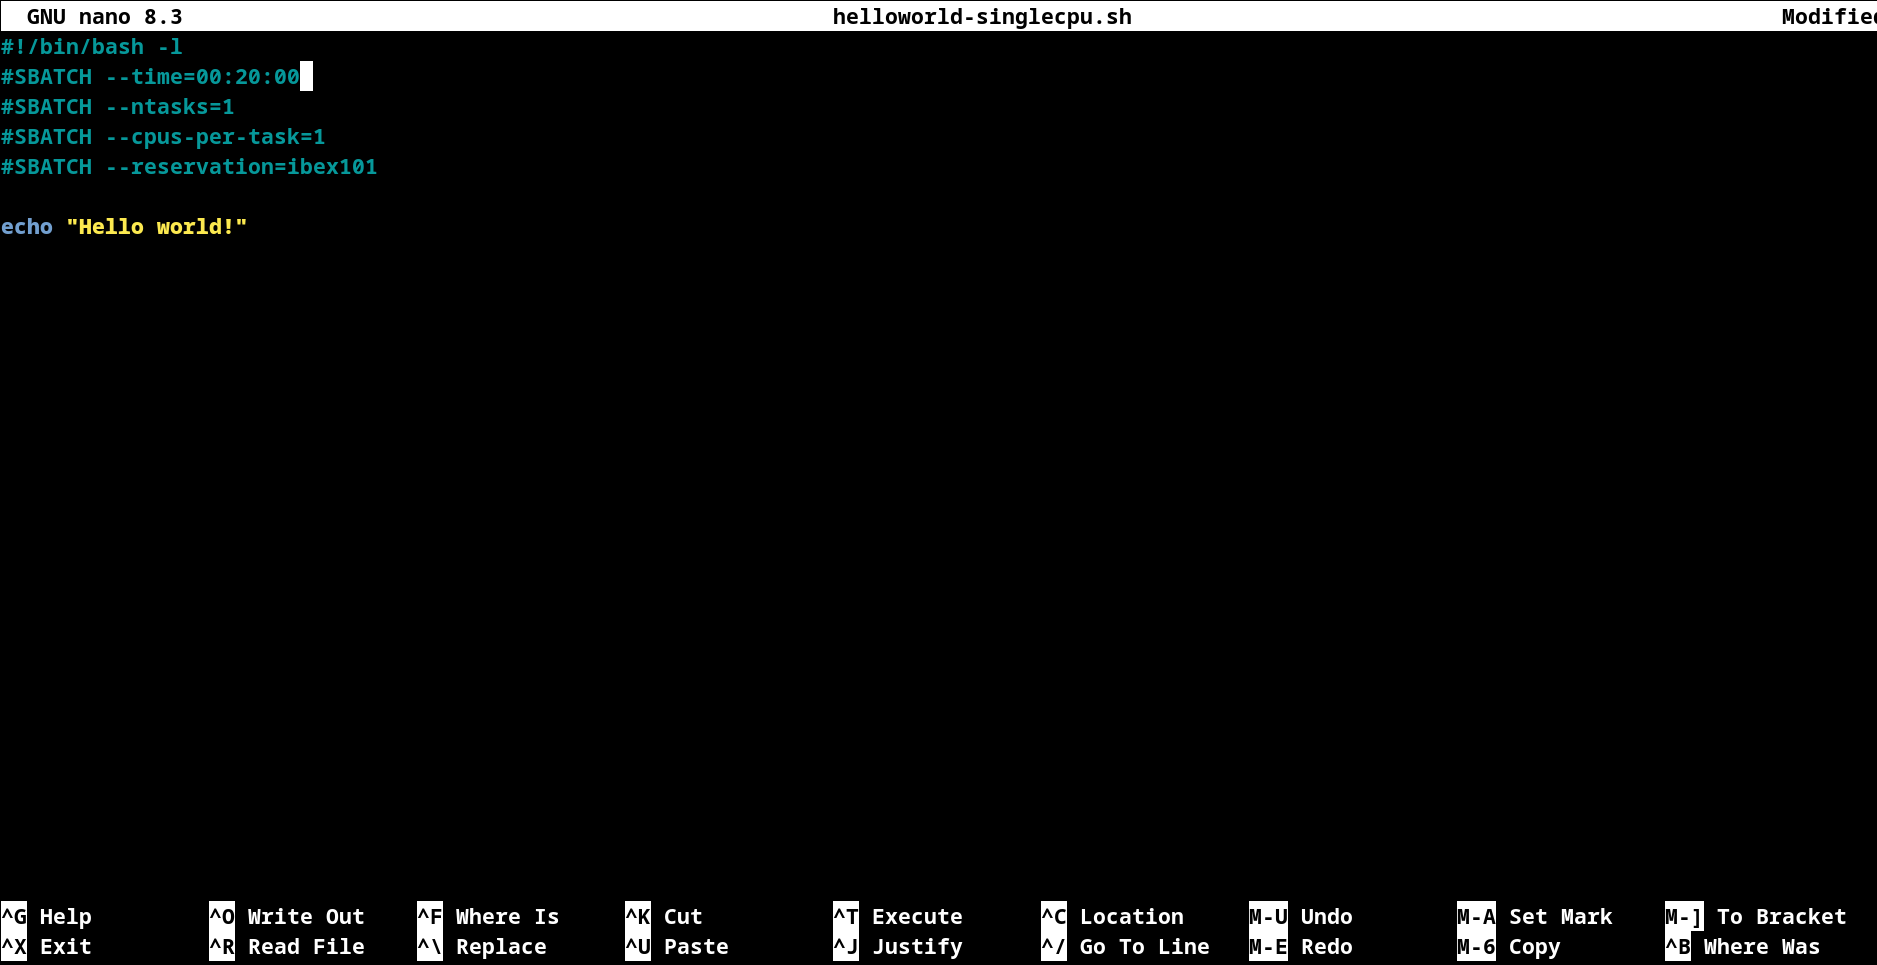
After completing the necessary edits, press Ctrl + o to save the changes, then Ctrl + x to exit the editor.
Searching a Text:
To search for a particular word inside the text editor, press Ctrl + w. This will open a search prompt where you can type in the text you want.
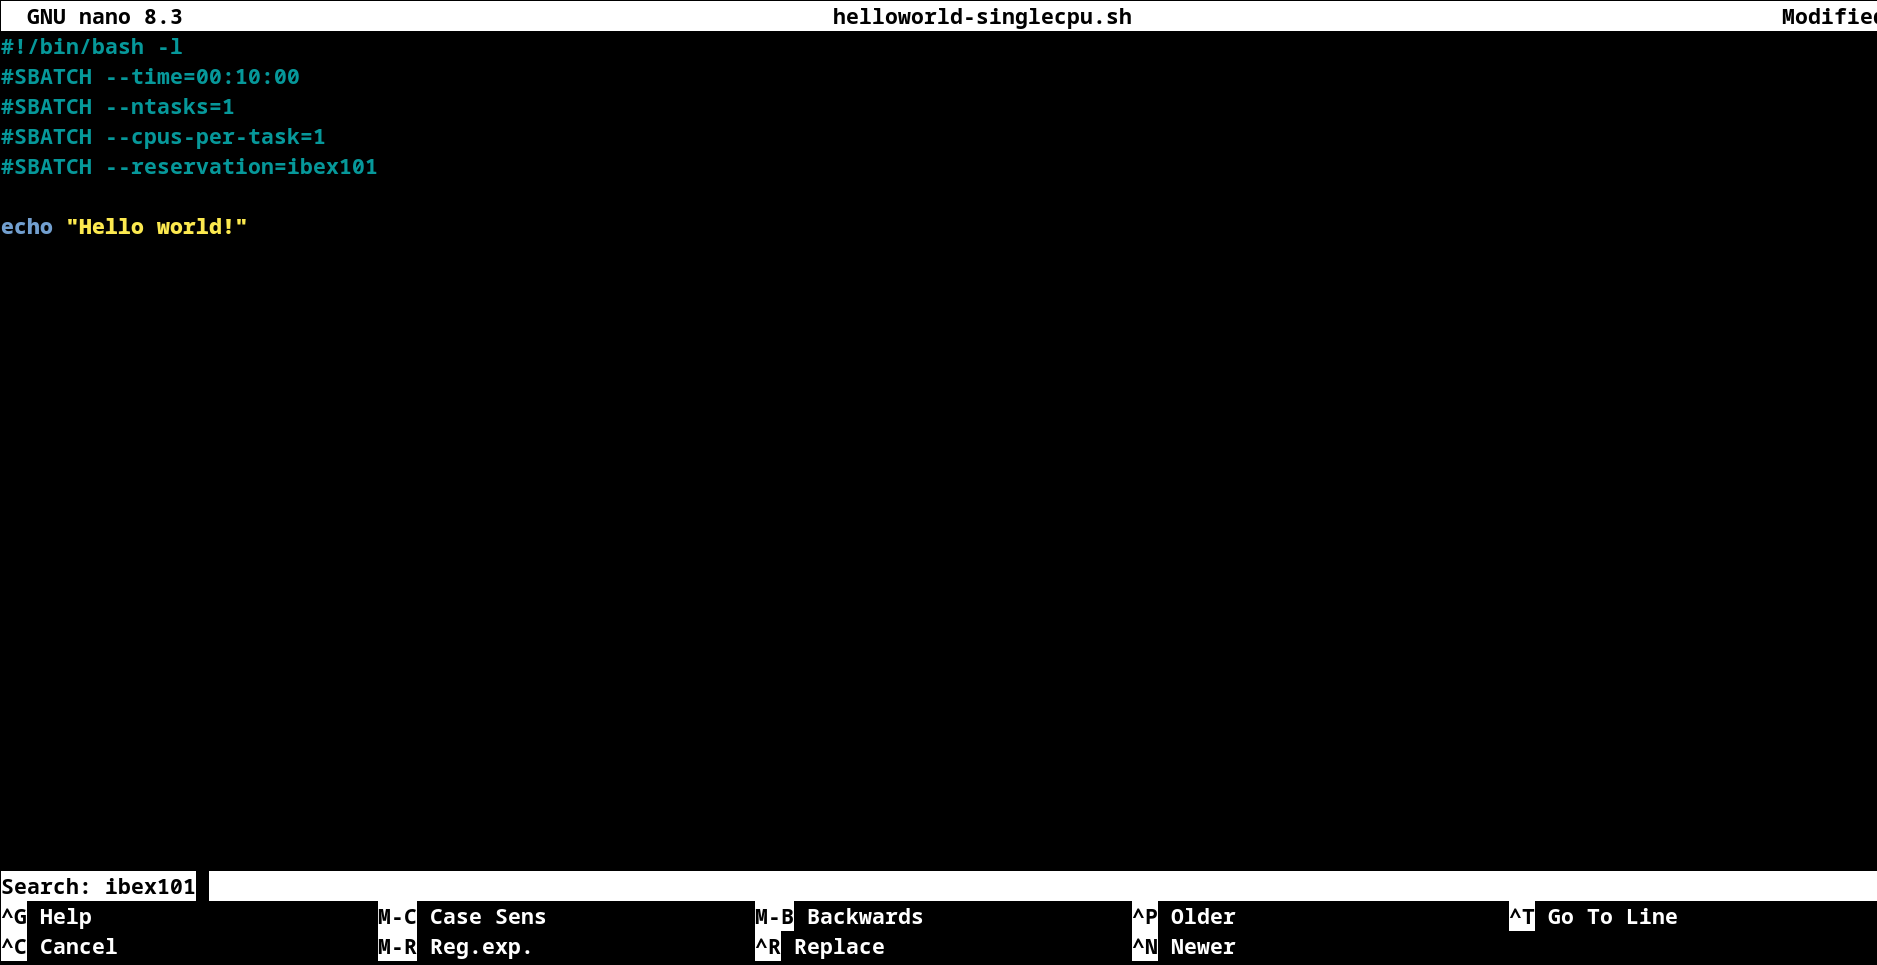
After pressing Enter the cursor will be moved to the first match. To move to the next result, press Alt + w.
Common Nano Shortcuts
Shortcut |
Action |
|---|---|
|
Save (Write Out) |
|
Exit |
|
Cut current line |
|
Paste line |
|
Search (Where Is) |
Basic jobscript#
A typical jobscript has two major sections:
SLURM Directives.
The commands to run on allocated computational resource.
cd /ibex/user/$USER/ibex_101_labs/using-slurm
Note
The reservation ibex101 is only available during the Hands-on session.
After the session, you need to remove that line before submitting one of the scripts from the GitHub repo.
Using the script helloworld.sh which described as follows:
#!/bin/bash -l
#SBATCH --time=00:10:00
#SBATCH --reservation=ibex101


echo "helloworld"
Since we didn’t specify to slurm the amount of cpus and memory needed, it will allocate the default 2GB memory with 1 CPU.
Note
The reservation ibex101 is used for the Hands-on session period only.
Job submission for multi-CPUs#
Using the script helloworld-multicpu.sh which described as follows:
#!/bin/bash -l

#SBATCH --ntasks=4
#SBATCH --ntasks-per-node=4
#SBATCH --time=00:10:00
#SBATCH --reservation=ibex101

srun -n 4 echo "Hello world!"
Using sbatch command submits your jobscript to SLURM.
Upon successful submission a unique job ID is assigned.
Job is queued and awaits allocation of the requested resources.
A priority is assigned to each job based on first come basis.
sbatch my-jobscript.sh
Output:

Submitted batch job 33204519
Job monitoring#
The squeue command shows the current jobs in the SLURM queue.
You can use --user to only show your jobs.
squeue --user=$USER
Ex: Use sbatch command to submit a jobscript, then check its status.
Questions:
What is the state of your job?
Which node is your job assigned to (if running)?
Job accounting#
The sacct command shows detailed information about past jobs, including completed, failed, or canceled jobs.
Ex: You want to view details of your completed or canceled job.
sacct --user=$USER
Add more detail by using:
sacct --user=$USER --format=JobID,JobName,Partition,State,ExitCode
Questions:
What is the state of your job (e.g., COMPLETED, FAILED)?
What was the exit code of your job?
Job cancelling#
The scancel command cancels a job in the SLURM queue.
scancel <job_id>
Ex: Submit a job, cancel it then verify it has been removed from queue:
Using the script my-jobscript.sh which described as follows:
#!/bin/bash -l
#SBATCH --time=00:10:00
#SBATCH --reservation=ibex101

sleep 300 #The sleep command tells the system to do nothing for the specified number of seconds.
sbatch my-jobscript.sh
Output:

Submitted batch job 33204519
scancel 33204519
squeue --user=$USER
SLURM standard output / error files#
When you submit a job to SLURM using a jobscript, the output and error messages are redirected to the files slurm-<jobid>.out and slurm-<jobid>.err by default.
You can specify the name for these files to include the jobid in the filename, using the following SLURM options in your jobscript.
#SBATCH --output=QC.%j.out          ## Console output file
#SBATCH --error=QC.%j.err           ## Console error file
When you submit the script using sbatch, the files will be generated as following.
sbatch myscript.sh
Output:

Submitted batch job 37104135
ls *.out
Output:

QC.37104135.out
ls *.err
Output:

QC.37104135.err
You can also include the hostname of the node being used.
#SBATCH --output=QC.%j.%N.out               ## Console output file
#SBATCH --error=QC.%j.%N.err                ## Console error file
When you submit the script using sbatch, the files will be generated as following.
sbatch myscript.sh
Output:

Submitted batch job 37104136
ls *.out
Output:

QC.37104135.out QC.37104136.gpu214-14.out
ls *.err
Output:

QC.37104135.err QC.37104136.gpu214-14.err
Job monitoring with “Job name”#
You can use –job-name in your jobscript to easily find your job in squeue using the given name.
#SBATCH --job-name=QC ## Name of your job
Now when you run squeue, you will find it listed as
squeue --user=$USER
Output:

JOBID PARTITION     NAME     USER ST       TIME  NODES NODELIST(REASON)
37104585    gpu     QC   username  R       1:25      1 gpu214-14
Email notifications#
SLURM’s email notification feature allows users to receive email updates about the status of their submitted jobs. This is particularly useful for monitoring job progress and being informed when a job starts, ends, or fails.
How to Enable Email Notifications in SLURM?
You can use the following options in your jobscript to configure email notifications:
--mail-type=<ALL/BEGIN/END/FAIL> #Specifies when to send email notifications.
--mail-user=<email>              #Specifies the email address to which notifications should be sent.
Options for --mail-type include:
BEGIN: Send an email when the job begins.
END: Send an email when the job finishes successfully.
FAIL: Send an email if the job fails.
ALL: Send emails for all job events (begin, end, fail, etc.).
EX: Run a job with email notifications configured
Using the script job_with_email.sh which described as follows:
#!/bin/bash -l
#SBATCH --job-name=email_example        # Job name
#SBATCH --output=email_example.out      # Standard output log
#SBATCH --error=email_example.err       # Error log
#SBATCH --nodes=1                       # Number of nodes
#SBATCH --ntasks=1                      # Number of tasks
#SBATCH --time=00:05:00                 # Time limit (hh:mm:ss)
#SBATCH --mail-type=ALL                 # Send email for all job events
#SBATCH --mail-user=your_email@kaust.edu.sa  # Your KAUST email address
#SBATCH --reservation=ibex101            # use ibex101 reservation

# Print some information about the job
echo "Job started on $(hostname) at $(date)"

# Simulate some work
sleep 60 #The sleep command tells the system to do nothing for the specified number of seconds.

# Job completion message
echo "Job completed at $(date)"
submit the job using sbatch
sbatch job_with_email.sh
Output:

Submitted batch job 37105347
In this exmaple you should receive emails at the specified address (your_email@kaust.edu.sa) when the job: Starts (BEGIN event), completes successfully (END event) or fails (if an error occurs).
Example email Notifications:
BEGIN notification
Slurm Job_id=37105347 Name=email_example Began, Queued time 00:00:01
END notification
Slurm Job_id=37105347 Name=email_example Ended, Run time 00:01:00, COMPLETED, ExitCode 0
FAIL notification
Slurm Job_id=37105347 Name=email_example Failed, Run time 00:00:00, FAILED, ExitCode 1
SLURM job examples#
CPU jobs#
cd /ibex/user/$USER/ibex_101_labs/slurm-job-examples/cpu-jobs
Single cpu job named as helloworld-singlecpu.sh which described as follows:
#!/bin/bash -l
#SBATCH --time=00:10:00
#SBATCH --ntasks=1
#SBATCH --cpus-per-task=1
#SBATCH --reservation=ibex101

echo "Hello world!"
Multithreaded job single node (openmp) named as openmp-singlenode.sh which described as follows:
#!/bin/bash -l
#SBATCH --time=00:10:00
#SBATCH --ntasks=1
#SBATCH --cpus-per-task=4
#SBATCH --reservation=ibex101

module load gcc

export OMP_NUM_THREADS=4
export OMP_PLACES=cores
export OMP_PROC_BIND=close

srun -c 4 ./openmp_hello_world
MPI job single node named as openmpi-singlenode.sh which described as follows:
#!/bin/bash -l
#SBATCH --time=00:10:00
#SBATCH --ntasks=4
#SBATCH --tasks-per-node=4
#SBATCH --reservation=ibex101

# Load the OpenMPI module
module load openmpi

# Print some information about the job
echo "Job running on $(hostname)"
echo "Number of tasks: $SLURM_NTASKS"
echo "Nodes allocated: $SLURM_JOB_NODELIST"

# Run the MPI program
mpirun -np 4 ./mpi_hello_world
MPI job multinode named as openmpi-multinode.sh which described as follows:
#!/bin/bash -l
#SBATCH --time=00:10:00
#SBATCH --nodes=2
#SBATCH --ntasks=8
#SBATCH --ntasks-per-node=4
#SBATCH --reservation=ibex101

# Load the OpenMPI module
module load openmpi

# Print some information about the job
echo "Job running on $(hostname)"
echo "Number of tasks: $SLURM_NTASKS"
echo "Nodes allocated: $SLURM_JOB_NODELIST"

# Run the MPI program
mpirun -np 8 ./mpi_hello_world
GPU jobs#
cd /ibex/user/$USER/ibex_101_labs/slurm-job-examples/gpu-jobs
Single gpu job named as singlegpu.sh which described as follows:
#!/bin/bash -l
#SBATCH --time=00:10:00
#SBATCH --gpus=1
#SBATCH --reservation=ibex101

module load cuda/11.8
nvidia-smi
Multiple GPUs single node named as multigpu-singlenode.sh which described as follows:
#!/bin/bash -l
#SBATCH --time=00:10:00
#SBATCH --cpus-per-task=2
#SBATCH --mem=32G
#SBATCH --gpus=2
#SBATCH --gpus-per-node=2
#SBATCH --constraint=rtx2080ti
#SBATCH --reservation=ibex101

module load cuda/11.8
srun -c 2 ./multi_gpu_program
Multiple GPUs on Multiple nodes named as multigpu-multinode.sh which described as follows:
#!/bin/bash -l
#SBATCH --time=00:10:00
#SBATCH --nodes=2
#SBATCH --ntasks=2
#SBATCH --ntasks-per-node=1
#SBATCH --cpus-per-task=6
#SBATCH --mem=32G
#SBATCH --gpus=4
#SBATCH --gpus-per-node=2
#SBATCH --constraint=rtx2080ti
#SBATCH --reservation=ibex101


module load cuda/11.8

srun -n 2 -N 2 -c 6 ./multi_gpu_program
constraints#
cd /ibex/user/$USER/ibex_101_labs/constraints
CPU constraints
CPU Family |
CPU |
Nodes |
Cores/node |
Clock (GHz) |
FLOPS |
Memory |
SLURM constraints |
local storage |
|---|---|---|---|---|---|---|---|---|
Intel Skylake |
skylake |
106 |
40 |
2.60 |
32 |
350GB |
intel, skylake |
744GB |
Intel Cascade Lake |
cascadelake |
106 |
40 |
2.50 |
32 |
350GB |
intel, cascadelake |
744GB |
AMD Rome |
Rome |
108 |
128 |
2.00 |
32 |
475GB |
amd, rome |
744GB |
Ex: In your jobscript use amd node then change it to an intel node submit and confirm the CPU type each time using lscpu command
Using the script cpu-constraints.sh which described as follows:
#!/bin/bash -l
#SBATCH --time=00:10:00
#SBATCH --ntasks=1
#SBATCH --cpus-per-task=1
#SBATCH --constraint=amd #intel
#SBATCH --reservation=ibex101

lscpu
Large memory nodes
Some nodes have larger memory for workloads which require loading big data in memory, e.g. some bioinformatics workloads, or data processing/wrangling creating input data for Machine Learning and Deep Learning training jobs.
CPU Family |
CPU |
Nodes |
Cores/node |
Clock (GHz) |
FLOPS |
Memory |
local Storage |
SLURM constraints |
|---|---|---|---|---|---|---|---|---|
Intel Cascade Lake |
cascadelake |
18 |
48 |
4.20 |
32 |
3TB |
6TB |
intel, largemem, cascadelake |
Intel Skylake |
skylake |
4 |
32 |
3.70 |
32 |
3TB |
10TB |
intel, largemem, skylake |
Ex: In your jobscript use specify a large memory node, submit and confirm the memory size using free -h command
Using the script large-memory-node.sh which described as follows:
#!/bin/bash -l
#SBATCH --time=00:10:00
#SBATCH --ntasks=1
#SBATCH --mem=1200G
#SBATCH --reservation=ibex101

free -h
GPU constraints
There are GPU nodes in Ibex cluster with GPUs of different microarchitecture. Note that all the GPUs on a single node are always of the same microarchitecture, there is no heterogeneity there.
Model |
GPU Arch |
Host CPU |
Nodes |
GPUs/ node |
Cores/ node |
GPU Mem |
GPU Mem type |
CPU Mem |
GPU Clock (GHz) |
CPU Clock (GHz) |
|---|---|---|---|---|---|---|---|---|---|---|
P6000 |
Pascal |
Intel Haswell |
3 |
2 |
36(34) |
24GB |
GDDR5X |
256GB |
1.5 |
2.3 |
P100 |
Pascal |
Intel Haswell |
5 |
4 |
36(34) |
16GB |
HBM2 |
256GB |
1.19 |
2.3 |
GTX-1080Ti |
Pascal |
Intel Haswell |
8 |
4 |
36(34) |
11GB |
GDDR5X |
256GB |
1.48 |
2.3 |
GTX-1080Ti |
Pascal |
Intel Skylake |
4 |
8 |
32(30) |
11GB |
GDDR5X |
256GB |
1.48 |
2.6 |
RTX-2080Ti |
Turing |
Intel Skylake |
3 |
8 |
32(30) |
11GB |
GDDR6 |
383G |
1.35 |
2.6 |
V100 |
Volta |
Intel Skylake |
6 |
4 |
32(30) |
32GB |
HBM2 |
383G |
1.29 |
2.6 |
V100 |
Volta |
Intel Cascade Lake |
1 |
2 |
40(38) |
32GB |
HBM2 |
383G |
1.23 |
2.5 |
V100 |
Volta |
Intel Cascade Lake |
30 |
8 |
48(46) |
32GB |
HBM2 |
383G |
1.29 |
2.6 |
A100 |
Ampere |
AMD Milan |
46 |
4 |
64(62) |
80GB |
HBM2 |
512G |
1.16 |
1.99 |
A100 |
Ampere |
AMD Milan |
8 |
8 |
128(126) |
80GB |
HBM2 |
1T |
1.16 |
1.5 |
Ex: In your jobscript use rtx2080ti, then change it to a v100, submit and confirm the GPU type each time using nvidia-smi command.
Using the script gpu-constraints.sh which described as follows:
#!/bin/bash -l
#SBATCH --time=00:10:00
#SBATCH --gpus=1
#SBATCH --constraint=rtx2080ti #v100
#SBATCH --reservation=ibex101

nvidia-smi
Application examples#
Data Science#
We’ll use Jupyter for the DS workload example.
cd /ibex/user/$USER/ibex_101_labs/application-examples/DS
There are Multiple ways to launch Jupyter on Ibex:
Launch Jupyter in one line
Using the file launch-jupyter-one-line.sh which described as follows:
#!/bin/bash -l
# Activate the environment and execute the commands within a subshell
(
    eval "$(conda shell.bash hook)"
    # Load and run packages
    module load machine_learning
    # or activate the conda environment
    #export ENV_PREFIX=$PWD/env
    #conda activate $ENV_PREFIX
    # module load cudnn/8.8.1-cuda11.8.0
    jupyter lab --no-browser --ip="$(hostname)".ibex.kaust.edu.sa
)
Run the following command to run on one GPU:
srun --gpus=1 --mem=100G --cpus-per-task=24 --time=00:30:00 --resv-ports=1 --reservation=ibex101 --pty /bin/bash -l launch-jupyter-one-line.sh
Now on your terminal you will see the same kind of message from jupyter.
To access the server, open this file in a browser:
file:///home/username/.local/share/jupyter/runtime/jpserver-44653-open.html
Or copy and paste one of these URLs:
http://gpu214-06.ibex.kaust.edu.sa:55479/lab?token=8a998b0772313ce6e5cca9aca1f13f2faff18d950d78c776
or http://127.0.0.1:55479/lab?token=8a998b0772313ce6e5cca9aca1f13f2faff18d950d78c776
Copy one of the lines of that start with http://gpuXXX-XX into your browser. You can now start using Jupyter.
Batch job for Jupyter
Using the file launch-jupyter-server.sh which described as follows:
#!/bin/bash -l
#SBATCH --time=00:30:00
#SBATCH --nodes=1
#SBATCH --gpus-per-node=1
#SBATCH --cpus-per-gpu=6
#SBATCH --mem=32G
#SBATCH --reservation=ibex101
#SBATCH --job-name=demo
#SBATCH --output=%x-%j-slurm.out
#SBATCH --error=%x-%j-slurm.err

# Load environment which has Jupyter installed. It can be one of the following:
# - Machine Learning module installed on the system (module load machine_learning)
# - your own conda environment on Ibex
# - a singularity container with python environment (conda or otherwise)

# setup the environment
module purge

# You can use the machine learning module
module load machine_learning/2024.01
# or you can activate the conda environment directly by uncommenting the following lines
#export ENV_PREFIX=$PWD/env
#conda activate $ENV_PREFIX

# setup ssh tunneling
# get tunneling info
export XDG_RUNTIME_DIR=/tmp node=$(hostname -s)
user=$(whoami)
submit_host=${SLURM_SUBMIT_HOST}
port=$(python -c 'import socket; s=socket.socket(); s.bind(("", 0)); print(s.getsockname()[1]); s.close()')
echo ${node} pinned to port ${port} on ${submit_host}

# print tunneling instructions
echo -e "
${node} pinned to port ${port} on ${submit_host}
To connect to the compute node ${node} on IBEX running your jupyter notebook server, you need to run following two commands in a terminal 1.
Command to create ssh tunnel from you workstation/laptop to glogin:

ssh -L ${port}:${node}.ibex.kaust.edu.sa:${port} ${user}@glogin.ibex.kaust.edu.sa

Copy the link provided below by jupyter-server and replace the NODENAME with localhost before pasting it in your browser on your workstation/laptop.
" >&2

# launch jupyter server
jupyter ${1:-lab} --no-browser --port=${port} --port-retries=0  --ip=${node}.ibex.kaust.edu.sa
Submit the job using the sbatch command:
sbatch launch-jupyter-server.sh
Once the job starts open a new terminal on your local machine and copy and paste the ssh tunnel command from the XXX-slurm.err file.
Example:
ssh -L 57162:gpu214-02.ibex.kaust.edu.sa:57162 $USER@glogin.ibex.kaust.edu.sa
From the XXX-slurm.err file copy one of the lines of that start with http://gpuXXX-XX into your browser.
Now we are ready to use our Jupyter client.
Ex: Run the python script pytorch_demo.py from the GitHub repo using a single node with 2 GPUs
Using the script single-node-2GPUs-job.sh which described as follows:
#!/bin/bash -l
#SBATCH --job-name=pytorch_multi_gpu     # Job name
#SBATCH --nodes=1                        # Use a single node
#SBATCH --ntasks=1                       # One task
#SBATCH --gpus=2                         # Request 2 GPUs
#SBATCH --cpus-per-task=8                # Request 8 CPUs
#SBATCH --mem=32G                        # Request 32G memory
#SBATCH --time=00:10:00                  # Time limit (hh:mm:ss)
#SBATCH --reservation=ibex101            # use ibex101 reservation

# Load necessary modules (if required)
module load machine_learning/2024.01

# Run the PyTorch script
python pytorch_demo.py
Submit the script using sbatch command
sbatch single-node-2GPUs-job.sh
The script detects the number of available GPUs and creates a random 1000x1000 tensor then performs a matrix multiplication operation on the tensor (tensor @ tensor.T) using the first GPU only.
If multiple GPUs are available, the script demonstrates how to distribute work across GPUs using PyTorch’s torch.nn.DataParallel
A simple PyTorch model torch.nn.Linear is created and wrapped in DataParallel to utilize multiple GPUs automatically.
A random input tensor (64x1000, batch size of 64) is processed by the model.
The script prints the output shape after processing.
Expected output:
GNU 13.2.0 is now loaded
Loading module for CUDA 11.8
CUDA 11.8 is now loaded
Loading module for Machine Learning 2024.01
Machine Learning 2024.01 is now loaded

Loading machine_learning/2024.01
Loading requirement: gcc/13.2.0 cuda/11.8
CUDA is available. Number of GPUs: 2
GPU 0: NVIDIA GeForce GTX 1080 Ti
GPU 1: NVIDIA GeForce GTX 1080 Ti
Using GPU: NVIDIA GeForce GTX 1080 Ti
Tensor created on: cuda:0
Matrix multiplication completed.
Result moved to CPU. Shape: torch.Size([1000, 1000])

Multi-GPU Example:
Output shape after DataParallel: torch.Size([64, 1000])
Bioinformatics#
We’ll be using FastQC as an example.
cd /ibex/user/$USER/ibex_101_labs/application-examples/Bio
Using the jobscript fastqc.sh which described as follows:
#!/bin/bash -l
#SBATCH --nodes=1                       ## No. of nodes to be used
#SBATCH --cpus-per-task=4               ## No. of threads to be used for this FastQC
#SBATCH --job-name=QC                   ## Name of your job
#SBATCH --output=QC.%J.out              ## Console output file
#SBATCH --error=QC.%J.err               ## Console error file
#SBATCH --time=01:30:00                 ## Expected execution time of your job
#SBATCH --mem=2G                        ## Estimated memory size (e.g. more than or equal to your fastq file)
#SBATCH --reservation=ibex101

#fetch the dataset files
cp -r /ibex/scratch/projects/ibex_cs_temp/ibex_101/dataset/ ./
cd dataset

#run the application:
module load fastqc/0.11.8
fastqc --threads 4 SRR975578_1.fastq.gz SRR975578_2.fastq.gz
Submit the job using the sbatch command.
sbatch fastqc.batch
After the job start, it will generate out and err files, watch the status of your job console error/output
more QC.17122614.err
Output:

Loading module for FastQC
FastQC 0.11.8 is now loaded
Started analysis of SRR975578_1.fastq.gz
Started analysis of SRR975578_2.fastq.gz
Approx 5% complete for SRR975578_1.fastq.gz
Approx 5% complete for SRR975578_2.fastq.gz
Approx 10% complete for SRR975578_1.fastq.gz
Verify the job completion status and application output files
cat QC.17122614.out
Output:

Analysis complete for SRR975578_1.fastq.gz
Analysis complete for SRR975578_2.fastq.gz
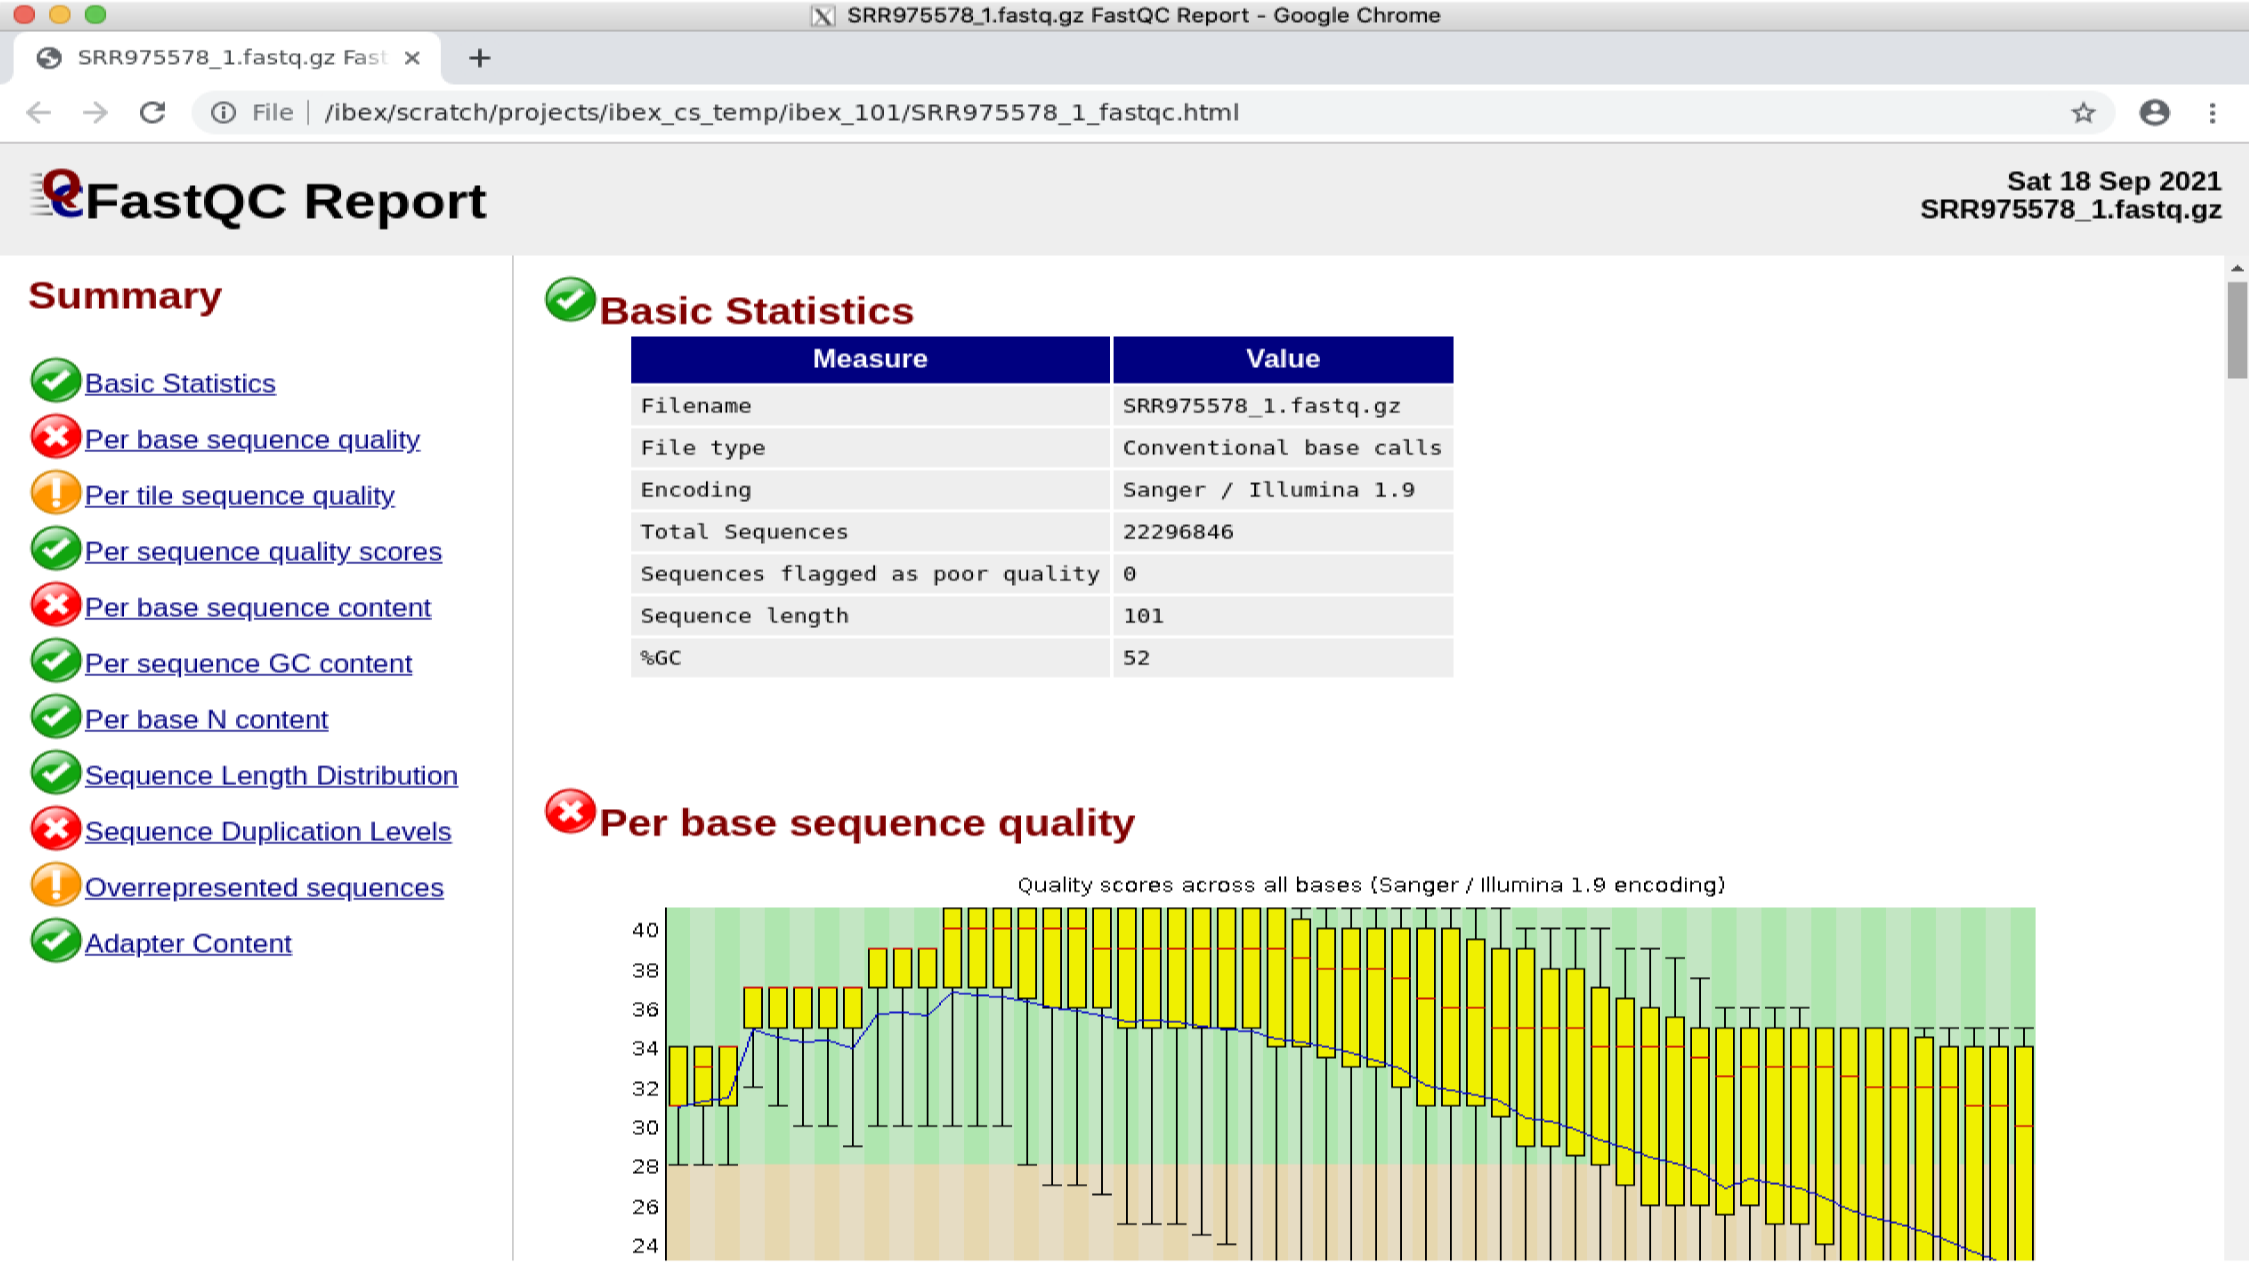
View the output file
google-chrome SRR975578_1_fastqc.html
Note
If you get an error related to process_singleton_posix, try using the following command then try again:
rm -Rf ~/.config/google-chrome/Singleton*
User survey#
We value your feedback. Please access the survey form by clicking here or scan the following QR Code below: