Ibex 101 Essentials: Onboarding & Real-Time Training#
1. An abstract of Ibex cluster#

2. Prerequisite to use Ibex#
2.1 Internet connection#
To start using Ibex you should be connected with iCampus/Uni-Fi/KAUST network or use VPN when outside of KAUST network.
2.2 Terminals#
Terminals are diverse, ranging from computer command-line interfaces such as Mac OS terminal, Windows Terminal and xterm. Below, we provide some examples of commonly used terminals for connecting to the Ibex cluster.
Mac OSx#
MacOS usually has a terminal application pre-installed. Please type Terminal in spotlight search tool to find it.
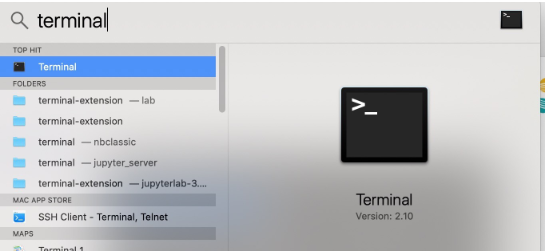
Open the terminal, copy and paste the command for the appropriate login node you wish to access.
Note
For macOS clients, it is necessary to install XQuartz (X11) to be able to use GUI applications.
Windows#
To get a ssh client application on a Windows machine, you can opt from one of the following methods:
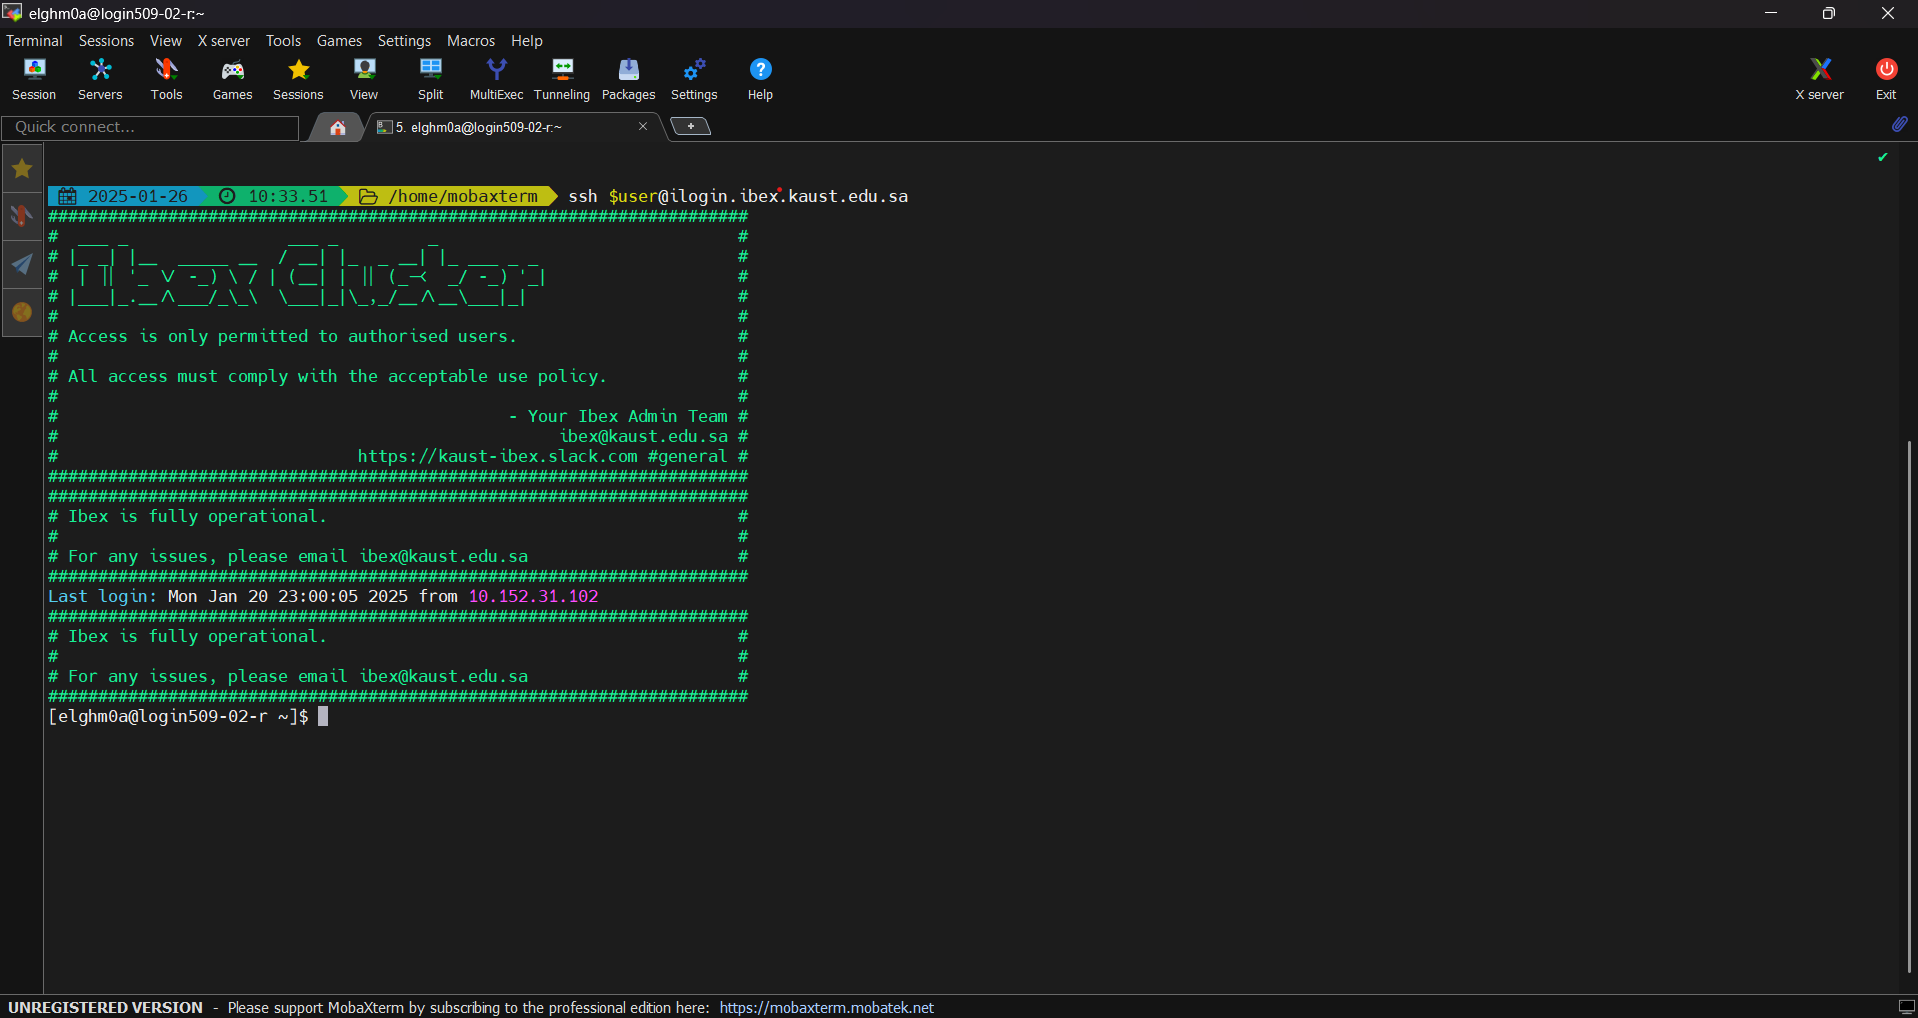
Download and install one of the
ssh clients: PuTTY, MobaXTerm or GitBashAs an example, here is how to use MobaXTerm on Windows to access KSL systems.
3. How to login?#
3.1 Ibex user name#
User name is your KAUST portal name and it should be in lowercase.
3.2 Different login nodes#
The login nodes serve as the primary access point to the Ibex cluster’s computing resources and filesystems. They are intended for interactive tasks such as editing job scripts, submitting and monitoring jobs in SLURM queues, performing lightweight data analysis, and managing or transferring data across directories and filesystems. It is not appropriate to run computationally intensive jobs on the login nodes; such workloads must be submitted to the compute nodes via the scheduler.
Ibex cluster consists of 3 different login nodes:
To submit CPU only jobs, login to ilogin
ssh -XY $USER@ilogin.ibex.kaust.edu.sa
Note
$USER is your KAUST username and should be in lowercase.
To submit jobs with GPU, login to glogin
ssh -XY $USER@glogin.ibex.kaust.edu.sa
If you want to access your files when editing/develop in IDE like VS Code, login to vscode
ssh -XY $USER@vscode.ibex.kaust.edu.sa
Note
If you’re using a personal Laptop / Desktop replace $USER with your KAUST username.
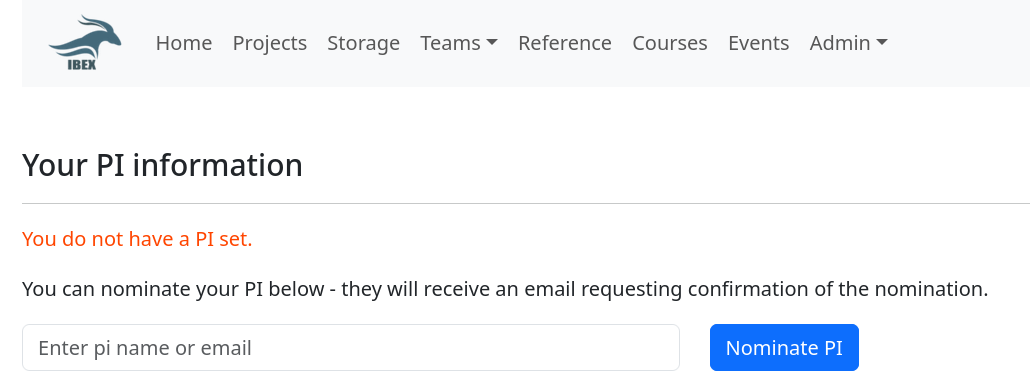
4. Nomination of your principal investigator#
Each Ibex user must be associated with a Principal Investigator (PI). Users who are not associated with a PI are subject to strict limitations on the amount of compute resources they can request. Please refer the Ibex policy
User can nominate PI through PI nomination
5. Ibex file systems#
5.1 Home filesystem#
User HOME directory: The /home filesystem is designed for lightweight, essential user files such as shell configuration files, software rc files, and installation or setup scripts. Each user is subject to quotas on both total storage capacity and the number of files. The filesystem is accessible at /home/$USER, and upon login, the session’s current working directory is set to the $HOME directory by default and 200GB per user.
Best practices: Due to its limited performance and shared nature, the /home filesystem should not be used to run jobs or applications, nor to store large datasets or software installations. Computational workloads and performance-sensitive tasks must be executed from appropriate high-performance filesystems.
Conda users: Installing the Conda package manager, Conda environments, and related cache files in /home/$USER is strongly discouraged, as these can quickly exceed quota limits and negatively impact filesystem performance. Instead, users should install Conda and manage environments and cache files in the /ibex/user/$USER filesystem, which is better suited for such use cases.
5.2 User HPC filesystem#
/ibex/user/$USER is a high performance parallel filesystem which provides storage for running your jobs and read/write data. In contrast the /home filesystem, this filesystem has low latency, high bandwidth and is capable of high I/O operations per second (IOPS). This parallel storage runs WekaIO Filesystem, they are providers of modern parallel filesystems tailored for high IOPS workloads such as AI and Bioinformatics.
User’s HPC filesystem has a capacity of 1.5TB per users and remains for the lifetime of the user’s account on Ibex. Users must manage their own files, which means if you run out of quota, there will be no extensions to the quota without exception.
6. Software Environment Modulefiles#
Linux modulesystem is a tool for enabling dynamically changing the environment of existing Linux shell. It is commonly used where multiple environments are expected to be used by one or multiple users. Rules can be added a modulefile and contains changes to be implemented when switching an environment from default to the desired.
A comprehensive set of software has already been optimally compiled on Ibex and made available to users via modulesystem.
module avail#
To view the available modules on your HPC cluster, use the following command:
module avail
Example: On glogin node check what versions of cuda are available?
ssh -XY $USER@glogin.ibex.kaust.edu.sa
module avail cuda
Example: On ilogin node, check available versions of GNU compiler modules
ssh -XY $USER@ilogin.ibex.kaust.edu.sa
module avail gcc
module load#
To load a module, use the module load command:
module load <package-name>
Example: On ilogin, load the GNU compiler:
ssh -XY $USER@ilogin.ibex.kaust.edu.sa
module load gcc
When loading a specific version of the package:
module load <package-name/version>
Example: Load the Python 3.11 module:
module load python/3.11
To unload a module and revert to the default environment, use the module unload command:
module unload package-name
Example: Unload previous Python version and use Python 3.9.16:
module unload python/3.11
module load python/3.9.16
Example: On glogin, load the CUDA module:
ssh -XY $USER@glogin.ibex.kaust.edu.sa
module load cuda
module list#
To see the modules currently loaded in your environment, use:
module list
Example:
Are there any modules loaded by default?
If yes, which ones are loaded?
Example: On ilogin node after loading openmpi module, check its version, check what other modules are loaded?
ssh -XY $USER@ilogin.ibex.kaust.edu.sa
module load openmpi
module list
7. SLURM#
SLURM is an open-source workload manager used on Linux clusters to schedule and manage jobs. It efficiently allocates computing resources such as CPUs, memory, and nodes, and controls job execution across the cluster.
During the Ibex 101 hands-on session, example job scripts are provided. You can copy these example job scripts to your personal workspace /ibex/user/$USER to follow along with the tutorial. Follow the steps below to copy the required job scripts.
cd /ibex/user/$USER
cp -Rf /ibex/scratch/projects/ibex_cs_temp/ibex_101  /ibex/user/$USER
cd /ibex/user/$USER/ibex_101
7.1 Job submission#
A typical jobscript has two major sections:
SLURM Directives.
The commands to run on allocated computational resource.
cd /ibex/user/$USER/ibex_101/using-slurm
Using the script helloworld.sh which described as follows:
#!/bin/bash -l
#SBATCH --time=00:10:00
#SBATCH --reservation=ibex101
#SBATCH --output=%j.out
#SBATCH --error=%j.err


echo "helloworld"
Since we didn’t specify to slurm the amount of cpus and memory needed, it will allocate the default 2GB memory with 1 CPU.
Note
The reservation ibex101 is used for the Hands-on session period only.
SLURM standard output / error files#
When you submit a job to SLURM using a jobscript, the output and error messages are redirected to the files slurm-<jobid>.out and slurm-<jobid>.err by default.
You can specify the name for these files to include the jobid in the filename, using the following SLURM options in your jobscript.
#SBATCH --output=%j.out             ## Console output file
#SBATCH --error=%j.err              ## Console error file
When you submit the script using sbatch, the files will be generated as following.
sbatch helloworld.sh
Output:

Submitted batch job 43854970
ls *.out
Output:

43854970.out
ls *.err
Output:

43854970.err
7.2 Job monitoring#
The squeue command shows the current jobs in the SLURM queue.
You can use --user to only show your jobs.
squeue --user=$USER
Example: Use sbatch command to submit a jobscript, then check its status.
Questions:
What is the state of your job?
Which node is your job assigned to (if running)?
cd /ibex/user/$USER/ibex_101/slurm-job-examples/gpu-jobs
Single gpu job named as singlegpu.sh to demonstrate nvidia-smi output which described as follows:
#!/bin/bash -l
#SBATCH --time=00:10:00
#SBATCH --gpus=1
#SBATCH --reservation=ibex101

module load cuda/11.8
nvidia-smi
Note
GPU jobs should be submitted from glogin node.
7.3 Job accounting#
The sacct command shows detailed information about past jobs, including completed, failed, or canceled jobs.
Example: You want to view details of your completed or canceled job.
sacct --user=$USER
Add more detail by using:
sacct --user=$USER --format=JobID,JobName,Partition,State,ExitCode
Questions:
What is the state of your job (e.g., COMPLETED, FAILED)?
What was the exit code of your job?
7.4 Job cancelling#
The scancel command cancels a job in the SLURM queue.
scancel <job_id>
Example: Submit a job, cancel it then verify it has been removed from queue:
cd /ibex/user/$USER/ibex_101/using-slurm
Using the script my-jobscript.sh which described as follows:
#!/bin/bash -l
#SBATCH --time=00:10:00
#SBATCH --reservation=ibex101
#SBATCH --output=%j.out
#SBATCH --error=%j.err

sleep 300 #The sleep command tells the system to do nothing for the specified number of seconds.
sbatch my-jobscript.sh
Output:

Submitted batch job 33204519
scancel 33204519
squeue --user=$USER
7.5 Example production workloads#
Data Science#
We’ll use Jupyter for the DS workload example.
cd /ibex/user/$USER/ibex_101/application-examples/DS
Batch job to launch Jupyter on Ibex
Using the file launch-jupyter-server.sh which described as follows:
#!/bin/bash -l
#SBATCH --time=00:10:00
#SBATCH --nodes=1
#SBATCH --gpus-per-node=1
#SBATCH --cpus-per-gpu=2
#SBATCH --mem=2G
#SBATCH --reservation=ibex101
#SBATCH --job-name=demo
#SBATCH --output=%x-%j-slurm.out
#SBATCH --error=%x-%j-slurm.err

# Load environment which has Jupyter installed. It can be one of the following:
# - Machine Learning module installed on the system (module load machine_learning)
# - your own conda environment on Ibex
# - a singularity container with python environment (conda or otherwise)

# setup the environment
module purge

# You can use the machine learning module
module load machine_learning/2024.01
# or you can activate the conda environment directly by uncommenting the following lines
#export ENV_PREFIX=$PWD/env
#conda activate $ENV_PREFIX

# setup ssh tunneling
# get tunneling info
export XDG_RUNTIME_DIR=/tmp node=$(hostname -s)
user=$(whoami)
submit_host=${SLURM_SUBMIT_HOST}
port=$(python -c 'import socket; s=socket.socket(); s.bind(("", 0)); print(s.getsockname()[1]); s.close()')
echo ${node} pinned to port ${port} on ${submit_host}

# print tunneling instructions
echo -e "
${node} pinned to port ${port} on ${submit_host}
To connect to the compute node ${node} on IBEX running your jupyter notebook server, you need to run following two commands in a terminal 1.
Command to create ssh tunnel from you workstation/laptop to glogin:

ssh -L ${port}:${node}.ibex.kaust.edu.sa:${port} ${user}@glogin.ibex.kaust.edu.sa

Copy the link provided below by jupyter-server and replace the NODENAME with localhost before pasting it in your browser on your workstation/laptop.
" >&2

# launch jupyter server
jupyter ${1:-lab} --no-browser --port=${port} --port-retries=0  --ip=${node}.ibex.kaust.edu.sa
Submit the job using the sbatch command:
sbatch launch-jupyter-server.sh
Once the job starts open a new terminal on your local machine and copy and paste the ssh tunnel command from the XXX-slurm.err file.
Example:
ssh -L 57162:gpu214-02.ibex.kaust.edu.sa:57162 $USER@glogin.ibex.kaust.edu.sa
From the XXX-slurm.err file copy one of the lines of that start with http://gpuXXX-XX into your browser.
Now we are ready to use our Jupyter client.
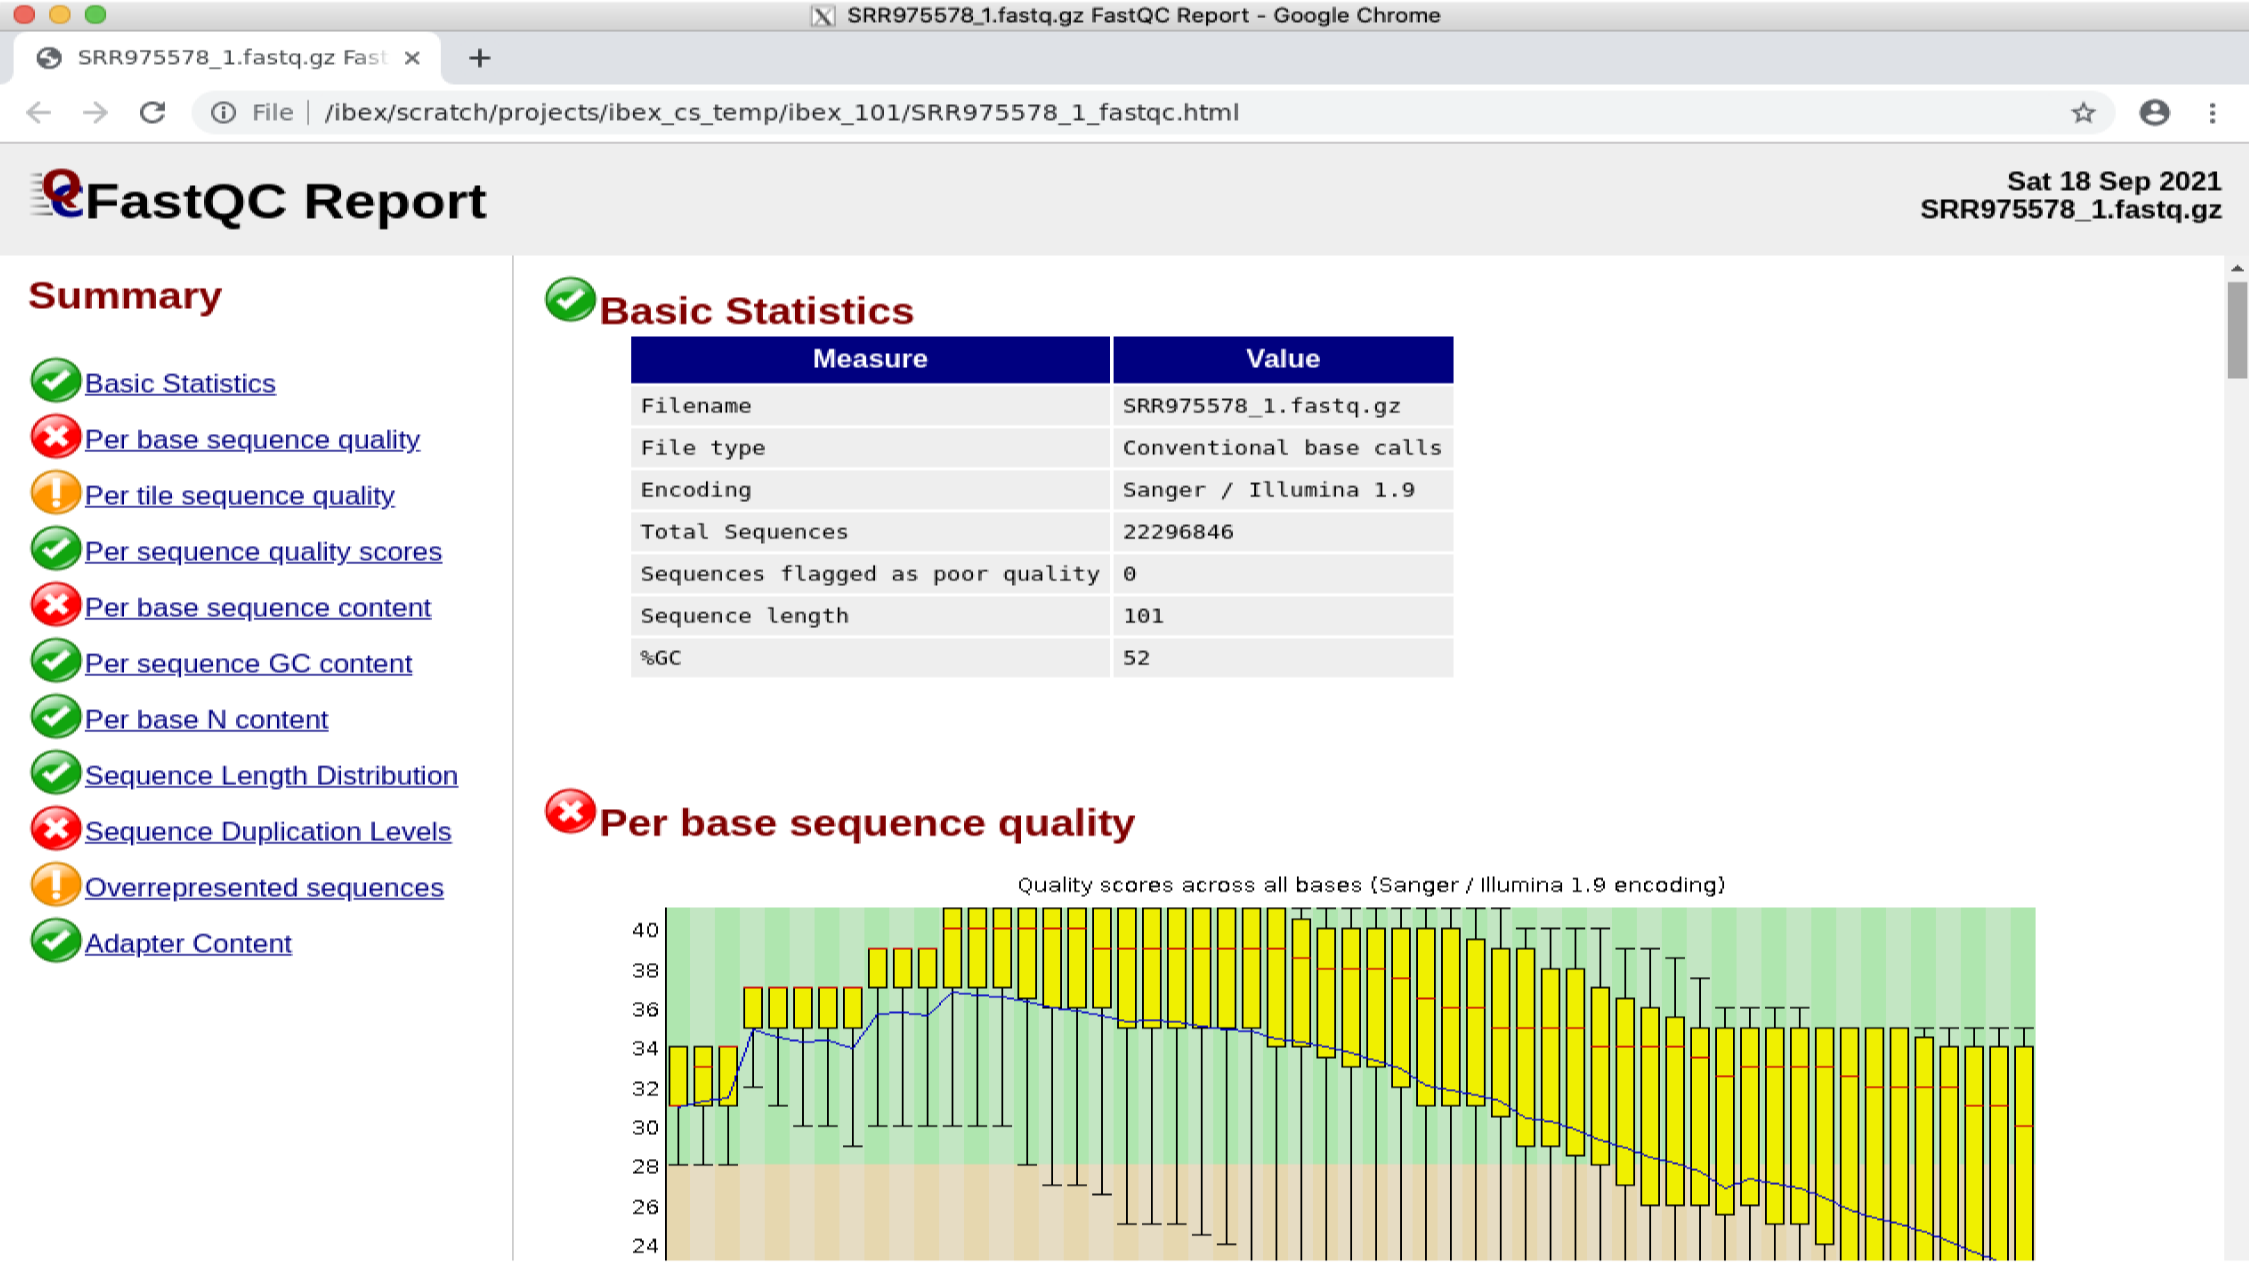
Bioinformatics#
We’ll be using FastQC as an example.
cd /ibex/user/$USER/ibex_101/application-examples/Bio
Using the jobscript fastqc.batch which described as follows:
#!/bin/bash -l
#SBATCH --nodes=1                       ## No. of nodes to be used
#SBATCH --cpus-per-task=4               ## No. of threads to be used for this FastQC
#SBATCH --job-name=QC                   ## Name of your job
#SBATCH --output=QC.%J.out              ## Console output file
#SBATCH --error=QC.%J.err               ## Console error file
#SBATCH --time=01:30:00                 ## Expected execution time of your job
#SBATCH --mem=2G                        ## Estimated memory size (e.g. more than or equal to your fastq file)
#SBATCH --reservation=ibex101

#fetch the dataset files
cp -r /ibex/scratch/projects/ibex_cs_temp/ibex_101/dataset/ ./
cd dataset

#run the application:
module load fastqc/0.11.8
fastqc --threads 4 SRR975578_1.fastq.gz SRR975578_2.fastq.gz
Submit the job using the sbatch command.
sbatch fastqc.batch
After the job start, it will generate out and err files, watch the status of your job console error/output
more QC.17122614.err
Output:

Loading module for FastQC
FastQC 0.11.8 is now loaded
Started analysis of SRR975578_1.fastq.gz
Started analysis of SRR975578_2.fastq.gz
Approx 5% complete for SRR975578_1.fastq.gz
Approx 5% complete for SRR975578_2.fastq.gz
Approx 10% complete for SRR975578_1.fastq.gz
Verify the job completion status and application output files
cat QC.17122614.out
Output:

Analysis complete for SRR975578_1.fastq.gz
Analysis complete for SRR975578_2.fastq.gz
View the output file
cd /ibex/user/$USER/ibex_101/application-examples/Bio/dataset
google-chrome SRR975578_1_fastqc.html
Note
If you get an error related to process_singleton_posix, try using the following command then try again:
rm -Rf ~/.config/google-chrome/Singleton*
8. Ibex Quiz#
Please access the quiz form by clicking here
9. Ibex survey#
We value your feedback. Please access the survey form by clicking here or scan the following QR Code:

10. Contact Us#
There are multiple venues you can contact us for support and information. Before sending a support request, be sure to navigate and search the documentation for related information.
The easiest and most efficient way is to contact Ibex support:
Ibex cluster helpdesk
Ibex Slack channel
As a rule of thumb, if the issue is complex to describe, please send an email for requesting support. If the question is of general nature and can be stated in a line or two, Slack channel is most appropriate.