Ollama on Ibex#
Welcome to the Ollama Evaluation Toolkit — a collection of guides and notebooks to help you run, test, and evaluate Ollama models interactively or in batch mode on Ibex.
Approach-1: Interactive Mode (Terminal-based)#
Learn how to launch and interact with Ollama models directly from the shell terminal. Ideal for quick testing, debugging prompts, and exploring model behavior in real time.
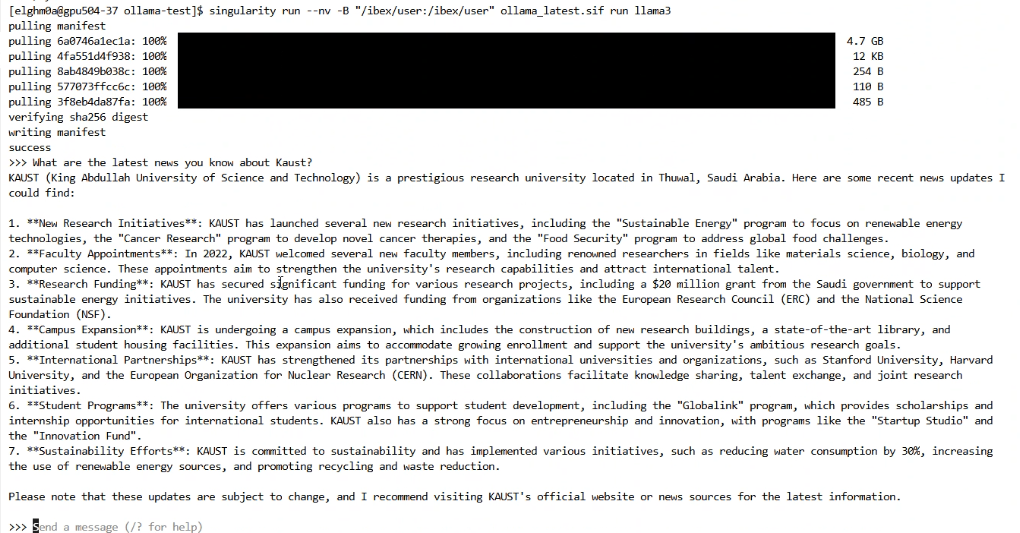
OLLama - Interactive Query Example#
Note
For more detailed steps, follow Ollama - Interactive Method with Singularity
Approach-2: Notebook Workflow (Jupyter-based)#
These notebooks demonstrate how to integrate and automate Ollama operations on Ibex using Singularity containers:
Run Ollama through the API interface, manage models, and test inference calls.
Use Python bindings to interact programmatically with Ollama for custom workflows.
Perform batch evaluations using LLM-as-a-Judge, comparing model outputs at scale.
Environment Setup#
If you haven’t installed conda yet, please follow How to Setup Conda on Ibex Guide to get started.
After conda has been installed, save the following environment yaml file on Ibex under the name ollama_env.yaml
name: ollama_env
channels:
  - conda-forge
  - defaults
dependencies:
  - jupyterlab=4.4.9
  - python=3.14.0
  - pip=25.2
  - ollama-python
Run the following command to build the conda environment:
conda env create -f ollama_env.yaml
Starting JupyterLab#
Follow the guide: Using Jupyter on Ibex to start JupyterLab using your conda environment.
To use your Conda environment instead of the preloaded module, update your Jupyter launch script as follows:
Open the Jupyter launch script in an editor.
Comment out the existing module load command.
Activate your Conda environment.
#module load machine_learning/2024.01
source /ibex/user/$USER/miniforge/etc/profile.d/conda.sh
conda activate ollama_env
Note
- See detailed steps in the following Jupyter notebooks :